
Are you still facing the error DNS_PROBE_FINISHED_NXDOMAIN in chrome? This article will helps you to fix this type of error in a easy way. In this article I am going to guide you to fix the error and not face this error in future also I have give the screenshots (images) of every step. Normally this error appears in the google chrome. This error makes the users boring to browse in the internet. The main reason for this error is the cache of the google chrome. You must clear the cache of the google chrome. There are two methods to fix this error. We are going to discuss the two methods to fix the DNS_PROBE_FINISHED_NXDOMAIN error in chrome.
Method -1: Clear cache of Google Chrome
You can clear cache of the google chrome in the settings section.
Method -2: Using Command Prompt
This method is little bit harder to fix the DNS_PROBE_FINISHED_NXDOMAIN. The steps are given below with images. This is the permanent way to fix the DNS_PROBE_FINISHED_NXDOMAIN. Follow the steps completely. Do the steps fullu and carefully to fix these error.
Step- 1:
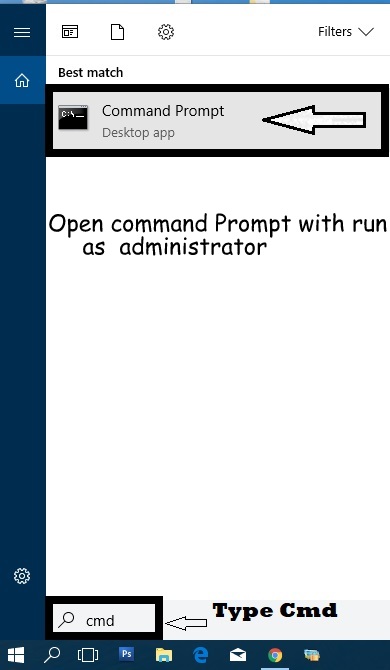
Click the search button and search cmd in the search bar and then right click the command prompt and then click the run as administrator. Now the command prompt opens. The keyboard shortcut for the search toolbar id winkey + R.
Step -2
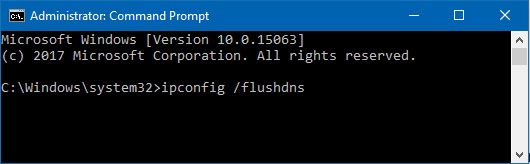
Use the following command without quotes and hit enter. “ipconfig /flushdns”
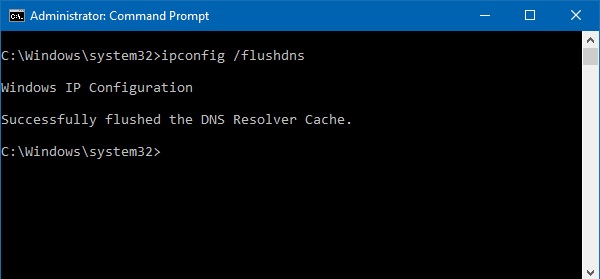
After hit the enter your command prompt show a successful message as given in the below image.
Step- 3
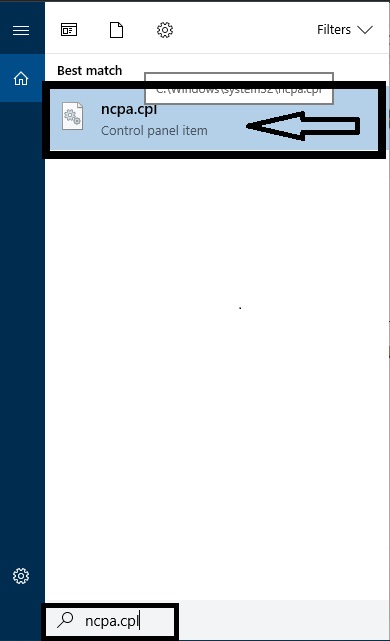
Use the keyboard shortcut winkey + R to open the search box or you can search directly in the search box. Now you have to search “ncpa.cpl” in the search box without quotes. Now open the displayed file. You will reach the network connections wizard.
Step -4
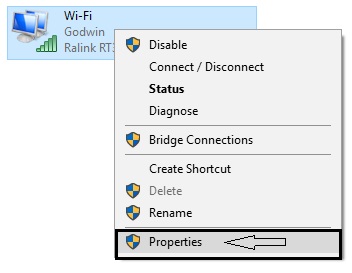
The network connections wizard displays. Right click the connected network and click the properties. In my case the connected network is godwin.
Step -6
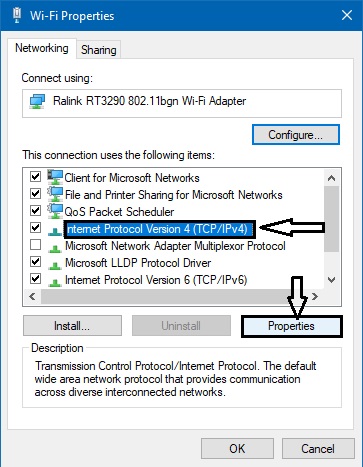
Now the properties dialog box opens. Now check the internet protocol version 4 (TCP/IPv4) and then click the properties button.
Step- 7
This is the last step. Now the properties dialog box appears. Check the use the following dns server addresses and then type the below in the two text columns
Preferred DNS server: 8.8.8.8
Alternate DNS server: 8.8.4.4
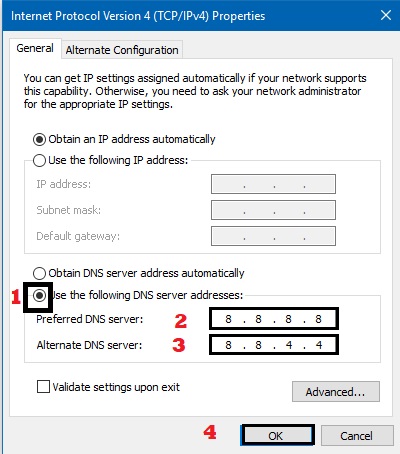
Click ok button. Now your error in the google chrome is fixed and you will never face the error in your future.
Conclusion
I gave the best way to fix this error. Share this article who needs the solution for this error. Sharing is caring. If this error is not fixed give your comments in the comments box located below. Thanks for reading.


 of every step. Normally this error appears in the google chrome.)